
Now that I’d checked and adjusted the valves on the DR350, it was a good time to change the oil. Unlike the previous bikes and scooter we’ve seen in this series, this bike has a dry-sump engine, common in dirtbikes and dual-sports.
Dry-sump designs store most of their oil in a tank separate from the engine, and use multi-stage pumps and oil lines to circulate the oil through the motor: in the case of this little Suzuki, the oil tank is actually the hollow steel frame of the bike itself. While more complex than a conventional wet sump engine, they offer a larger oil capacity, better temperature control of the oil, and more places for oil filtration; with no low-hanging oil pan, the engine can also be placed lower in the frame, allowing a lower center of gravity for good cornering. In a conventional wet sump engine, the majority of the oil collects in a large oil sump pan below the engine itself, and is pulled from the pan through an oil pickup tube and circulated through the engine via a large oil pump.
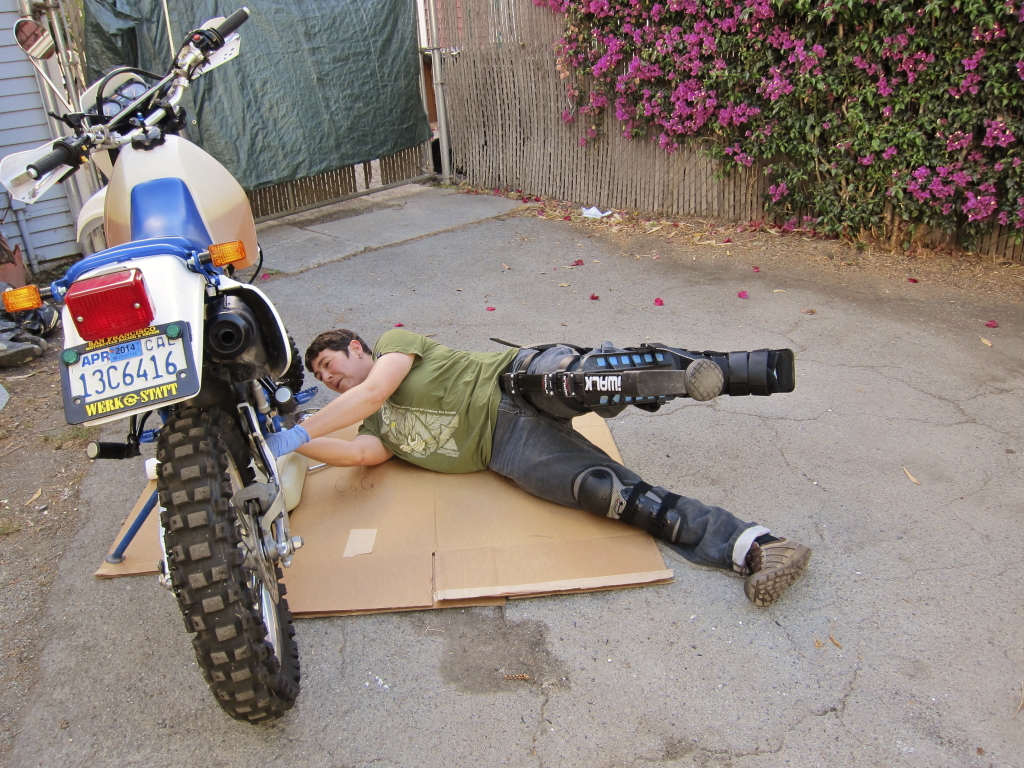
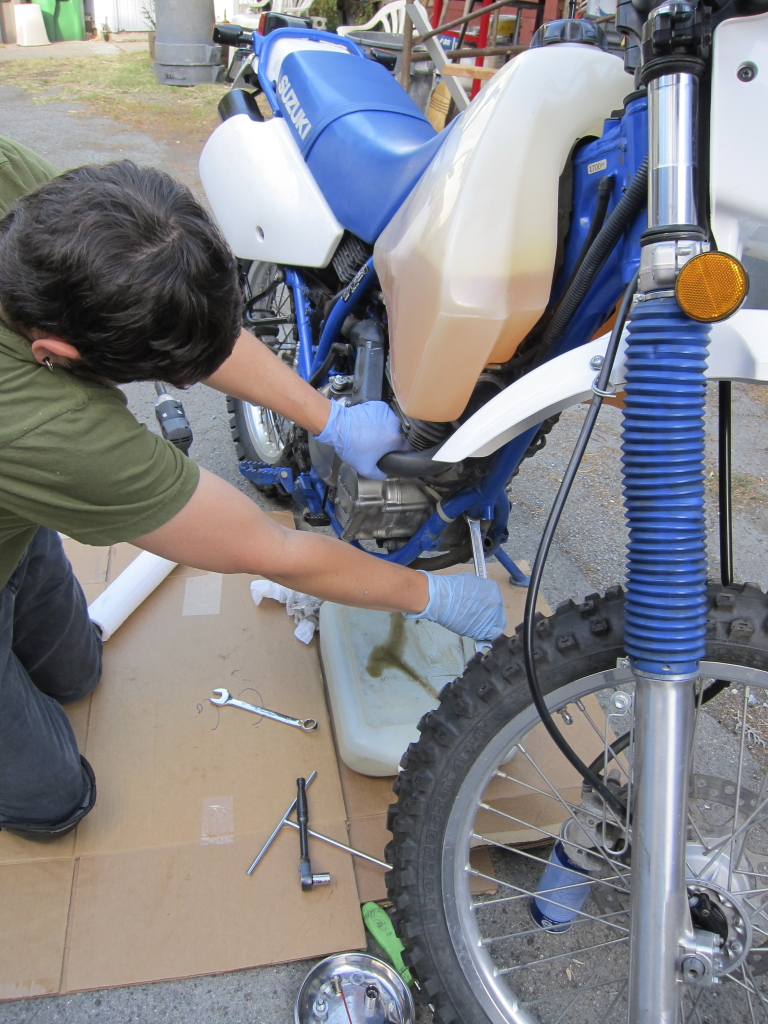
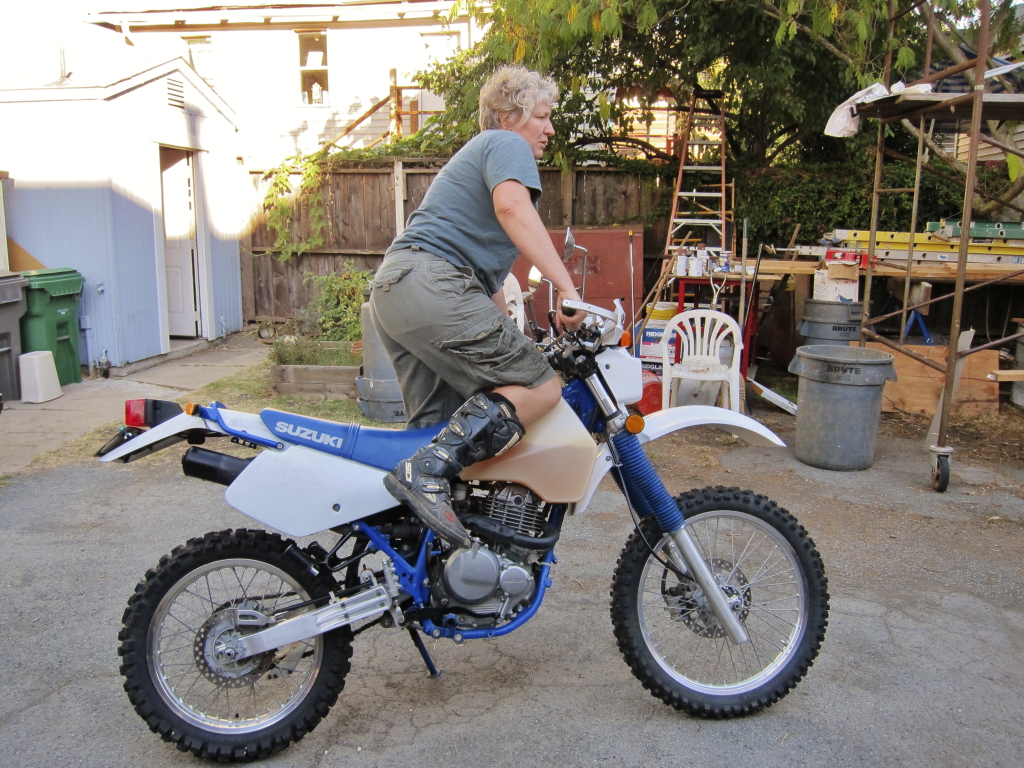
Whatever the engine design, oil, as I’ve said before, is the lifeblood of the engine. I rolled out the bike…
![]() DR350, ready for its oil change
DR350, ready for its oil change
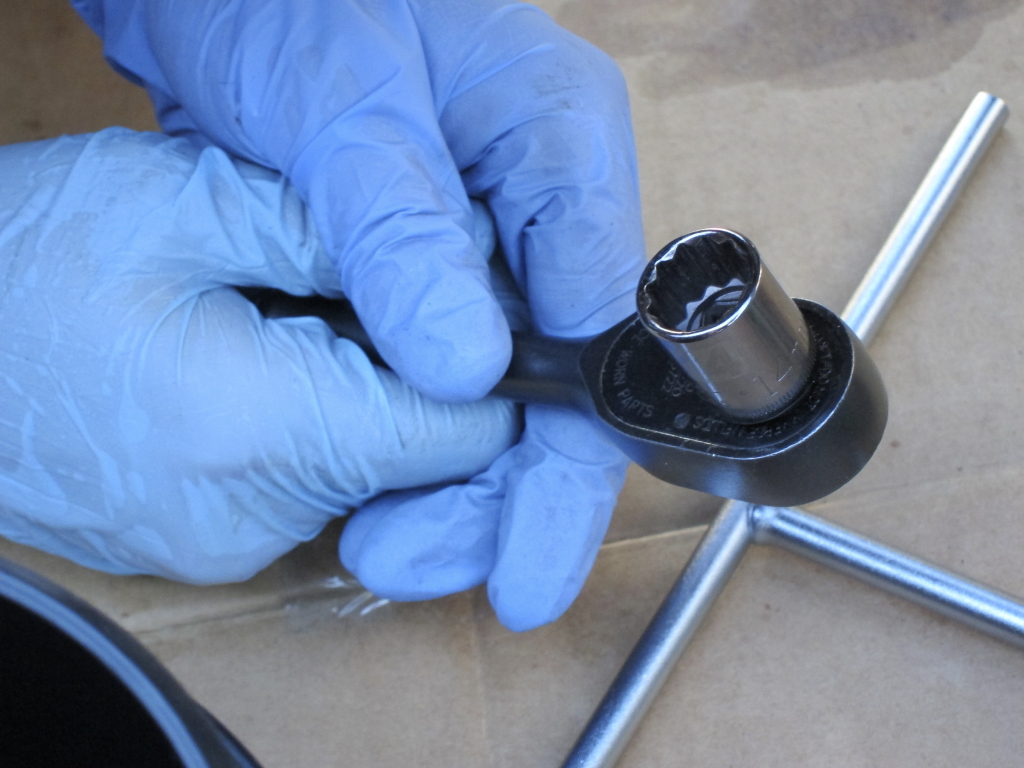
Gathered up my tools…
![]() Tools and supplies, organized and easy to grab
Tools and supplies, organized and easy to grab
And set things up to be clean, neat and under control with cardboard and my oil pan. Doing an oil change on a dry-sump engine is a bit more involved than a wet-sump variety, but good prep and readiness help make things easier.
(Find out how to get free oil and filter drainer gear and recycle your oil and filters in San Mateo County, San Francisco, Alameda County, Sonoma County, Napa County, Marin County and Sacramento.)
![]() Cardboard and a Riders Recycle drain pan ready to go
Cardboard and a Riders Recycle drain pan ready to go
In order to reach the oil pan and oil line bolts, it’s best to remove the skid plate, so I started there.
![]() First, pull off the skid plate
First, pull off the skid plate
All at once, the skid plate was off.
![]() Skid plate, removed
Skid plate, removed
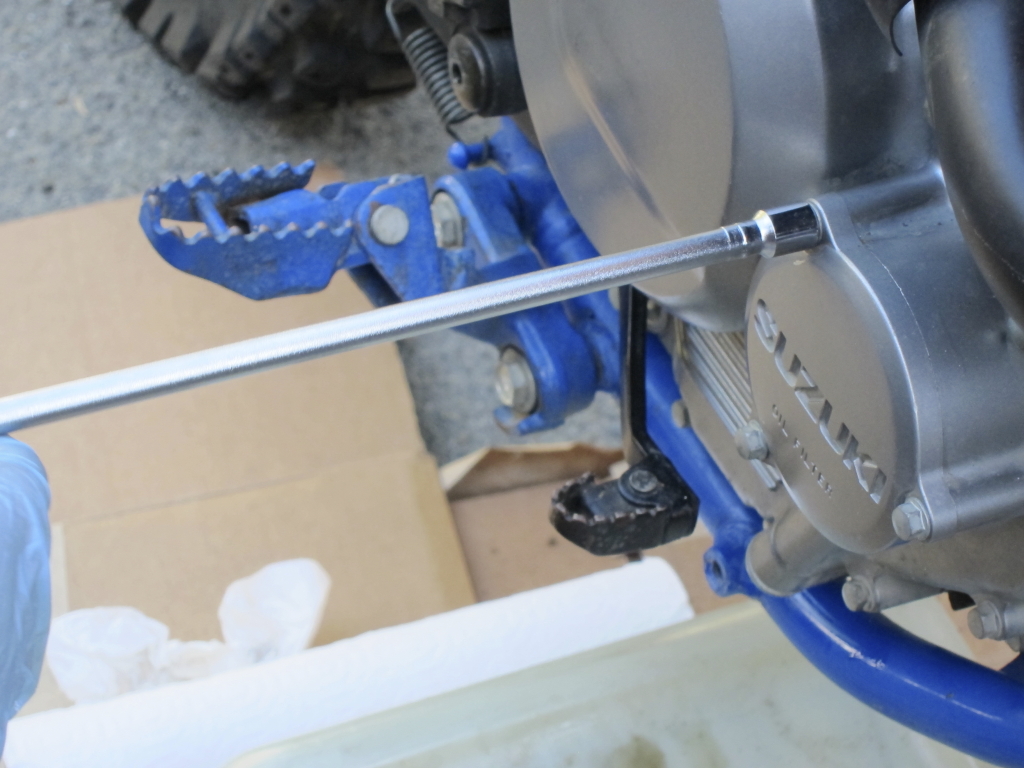
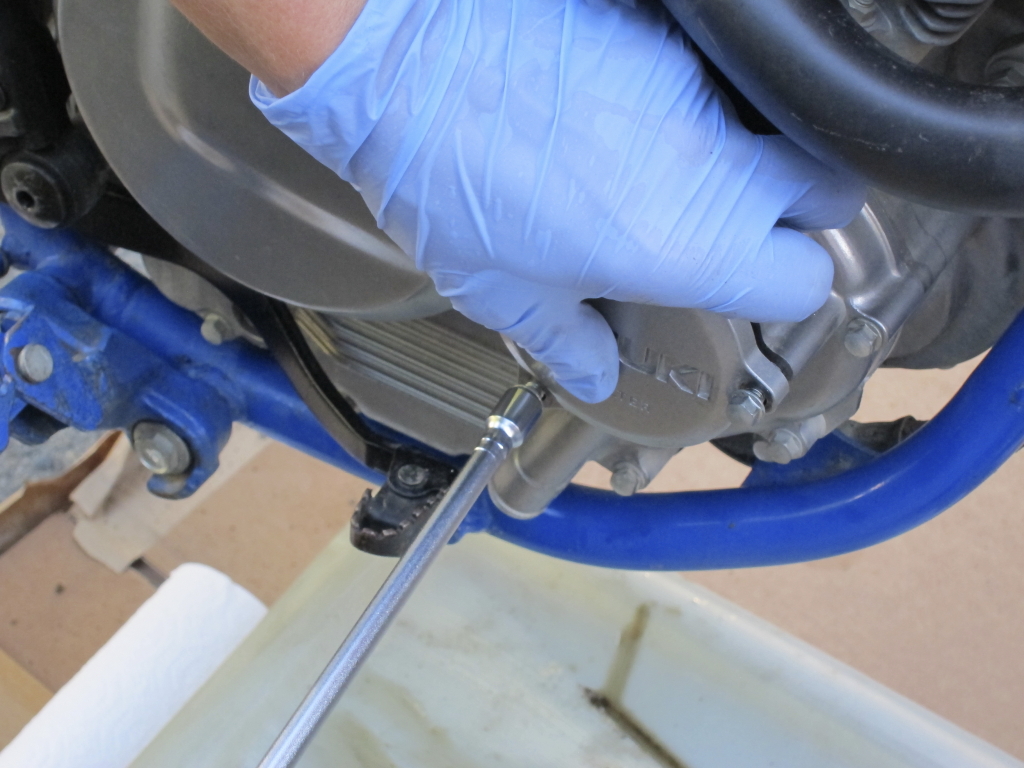
Next, I looked for the familiar drain bolt on the bottom of the engine crankcase, using my socket wrench and 14mm socket, and removed it. Never mind the broken foot and the peg leg I’m wearing–the oil must be changed!
I was careful to keep the oil pan under the drain hole, of course, when I removed the bolt to release the oil.
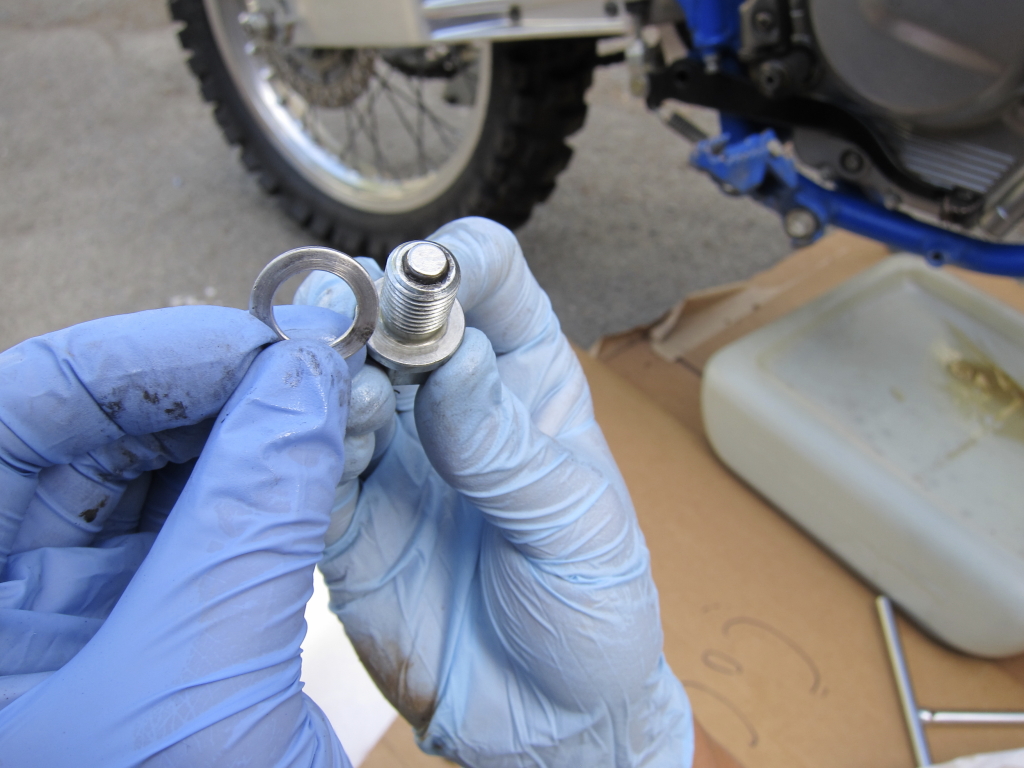
The drain bolt, and old crush washer, which I replaced with a new one.
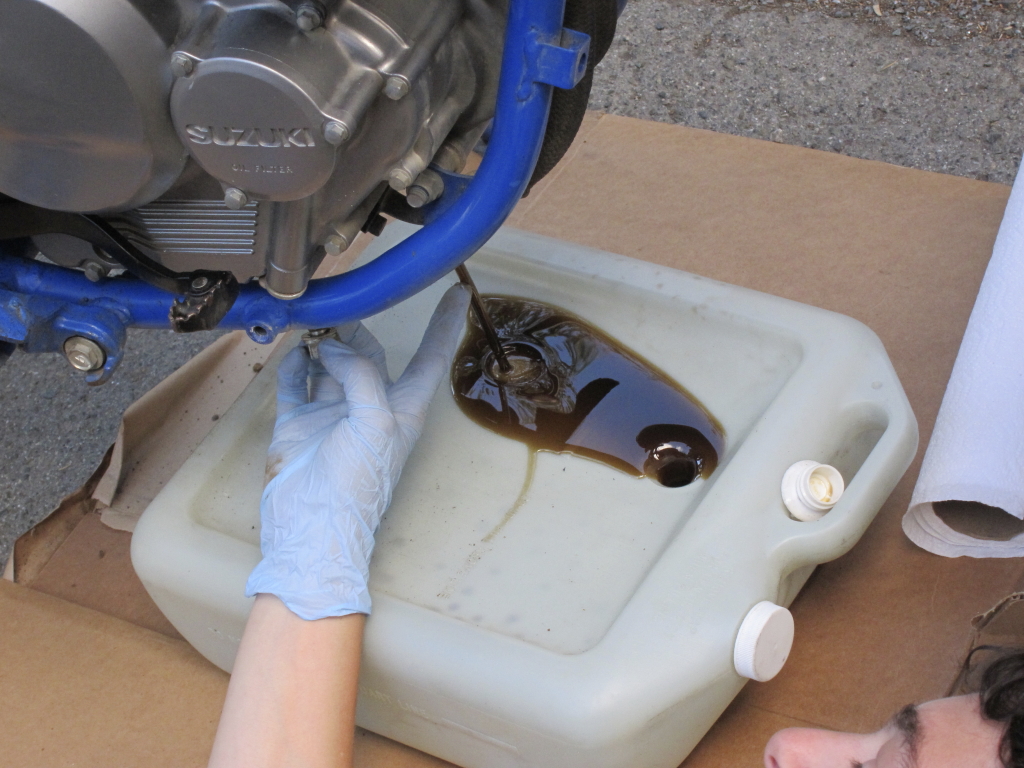
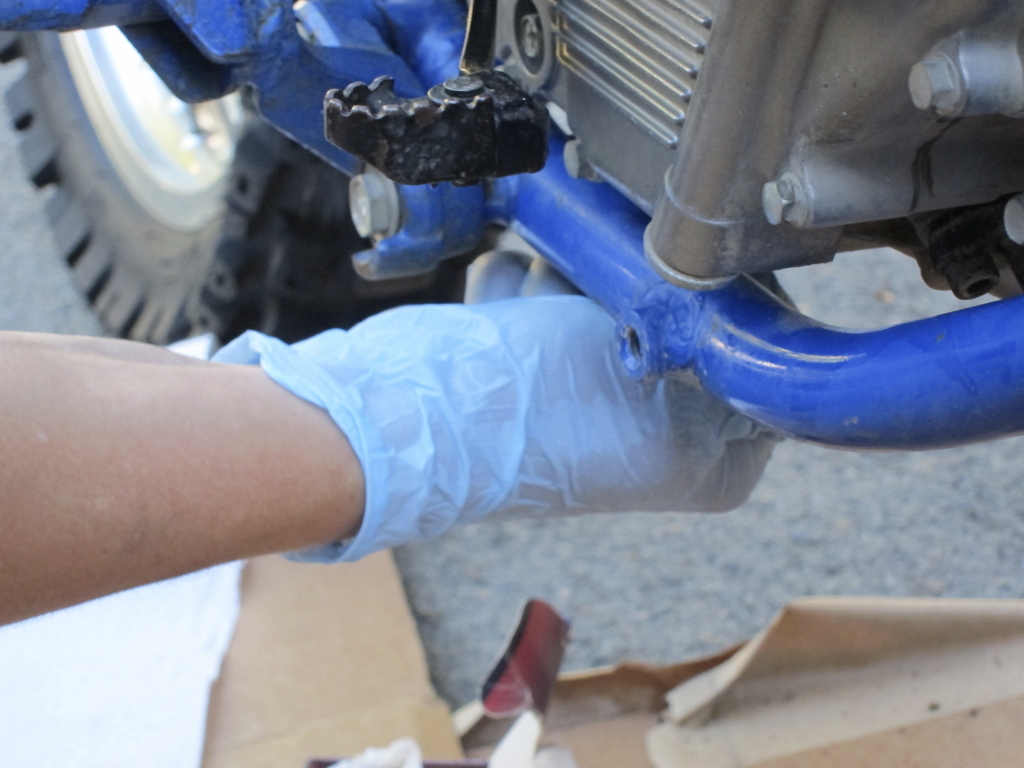
The next step was to drain the oil in the frame. I put a 12mm socket on my wrench and removed the drain bolt, allowing it to drain.
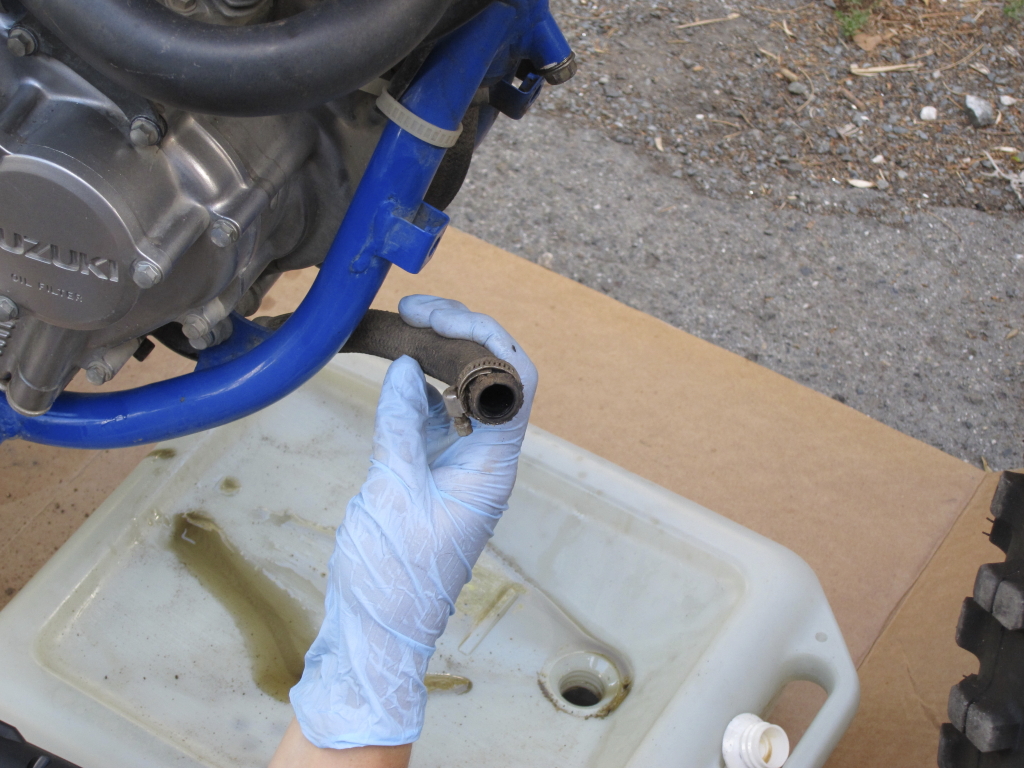
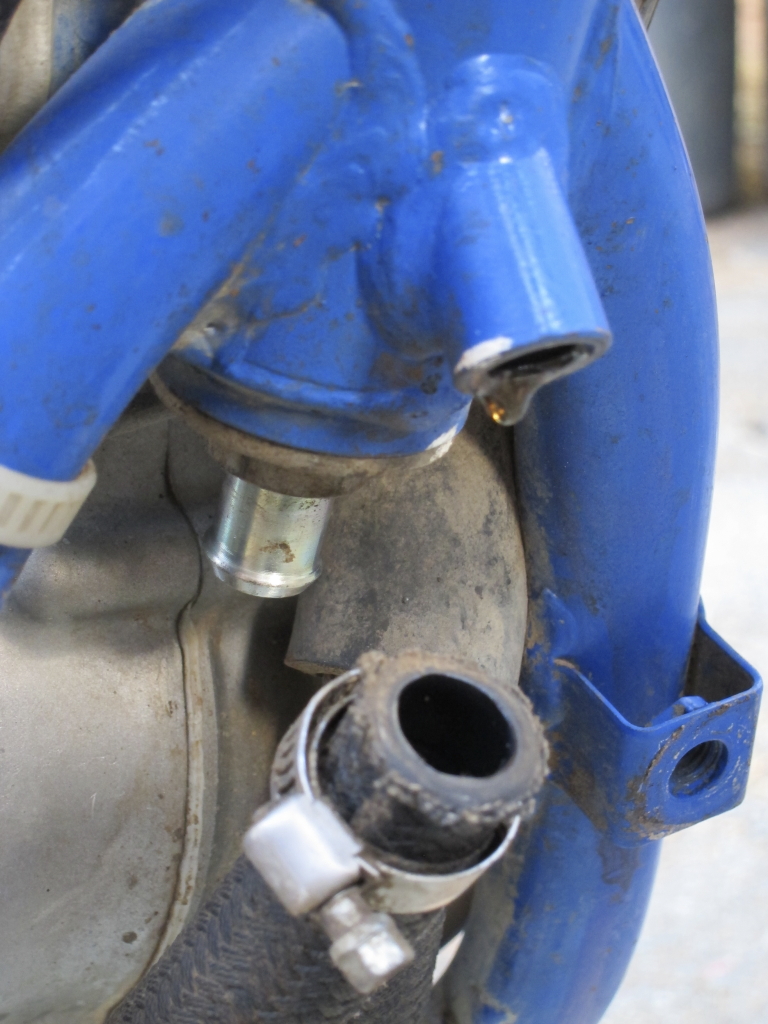
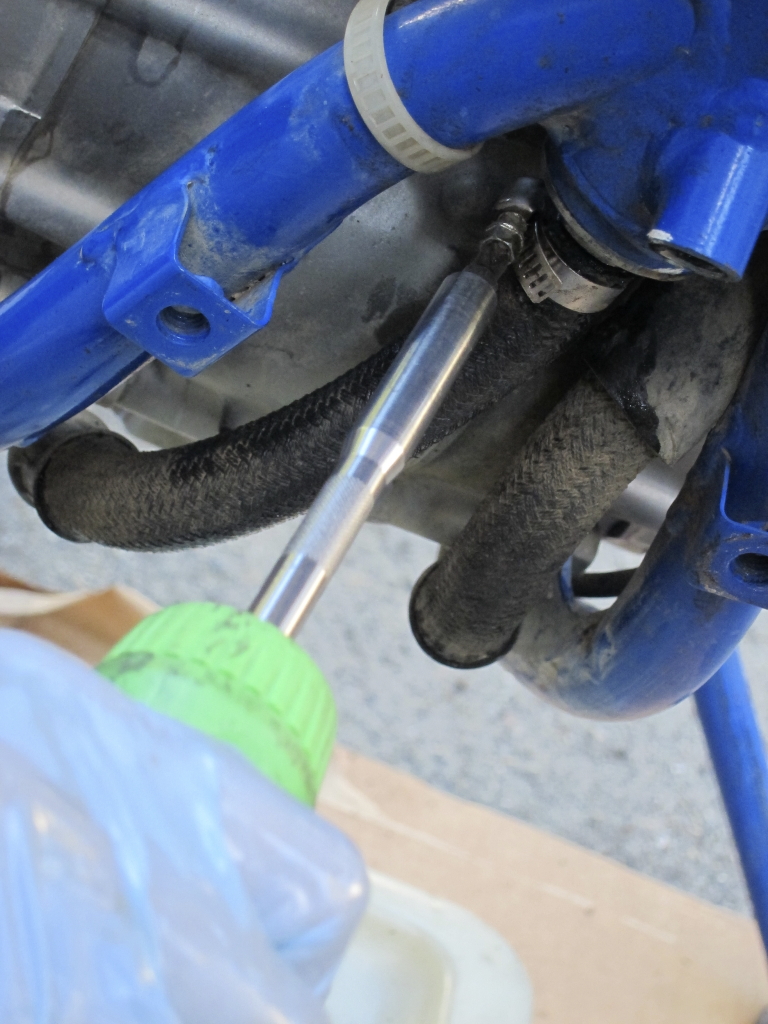
I removed the oil hose clamp, and wiggled the main oil line off.
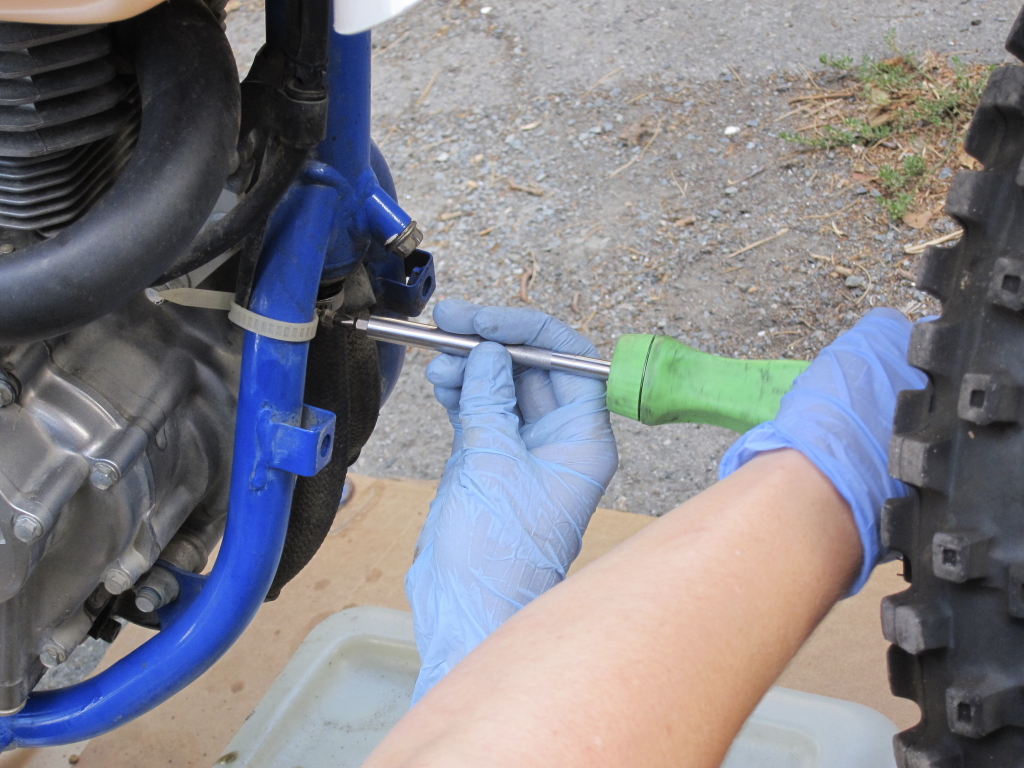
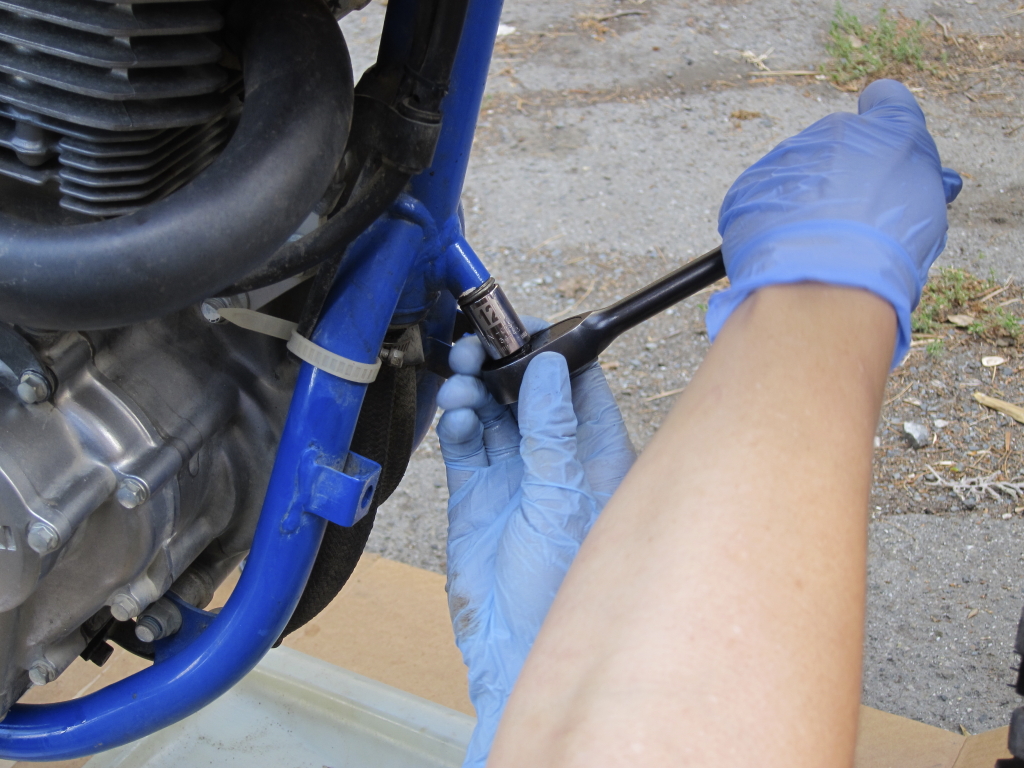
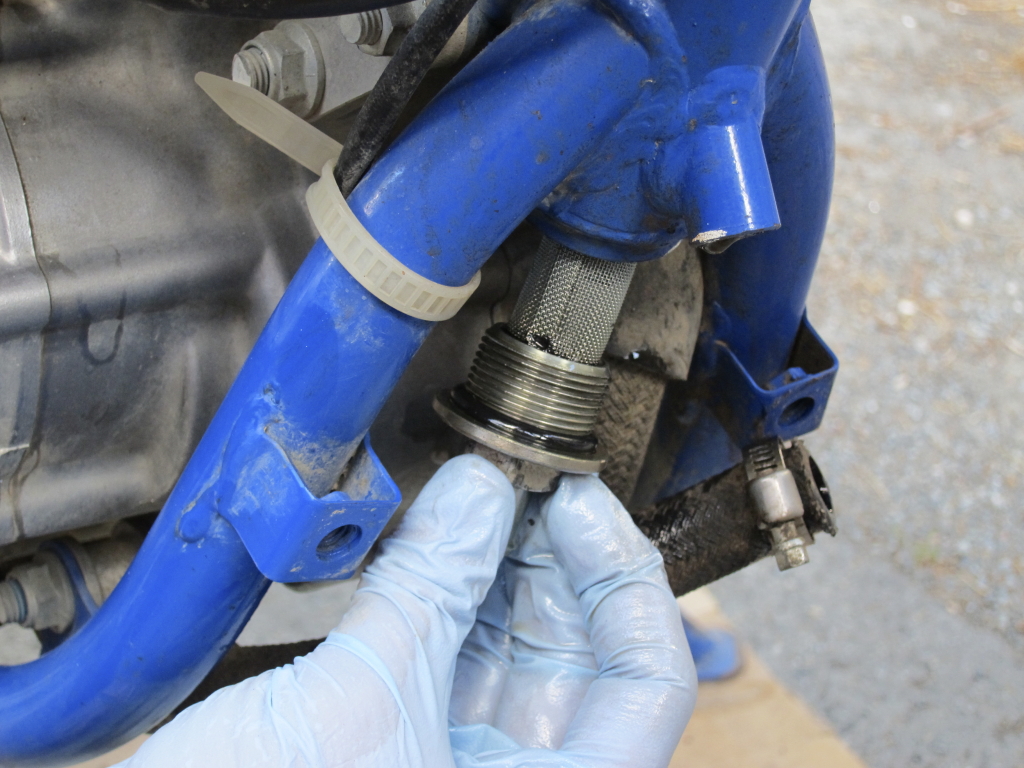
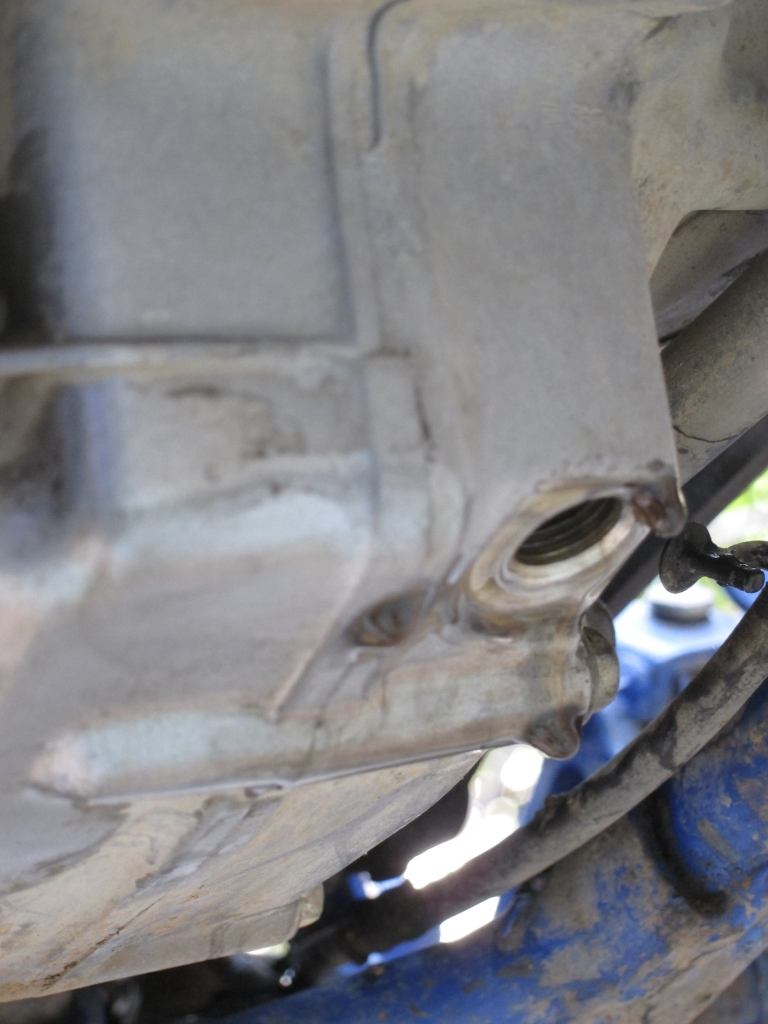
With the frame draining and the main oil line off, the oil strainer bolt was exposed.
The main oil line is attached to the oil strainer; once the line is removed, the 19mm nut is exposed. It’s torqued on pretty firmly, but I eventually broke it loose.
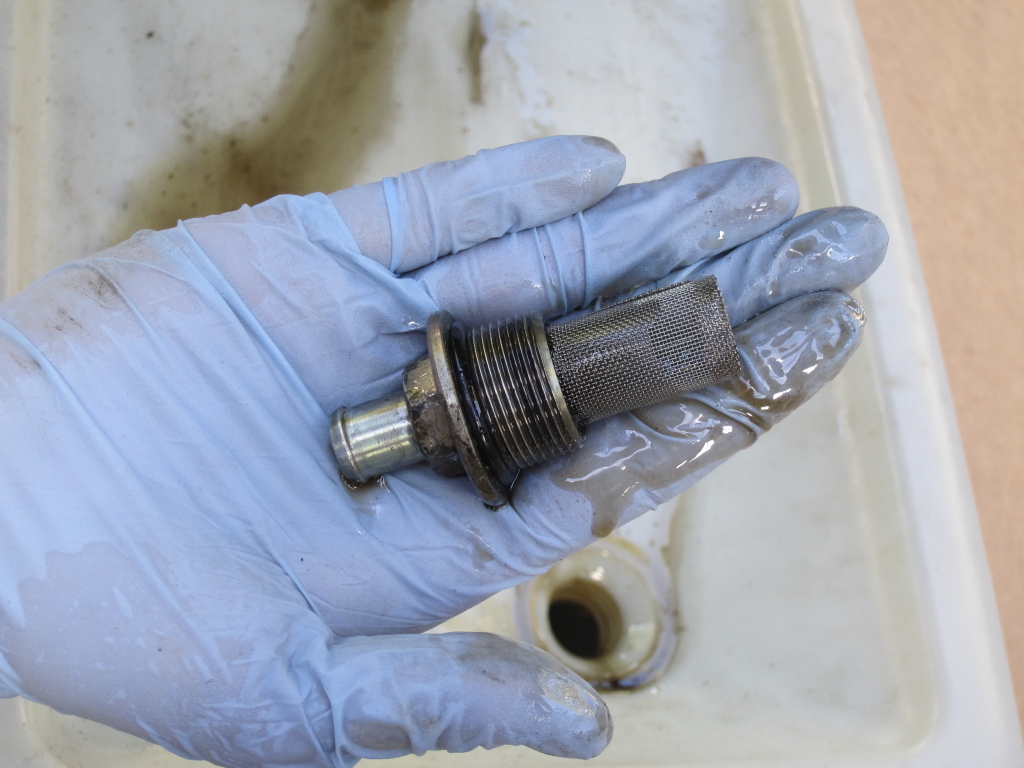
The oil strainer should be inspected for particles (fortunately there were none), and cleaned. I wiped mine off with a rag and sprayed it with all-purpose solvent, then let it dry.
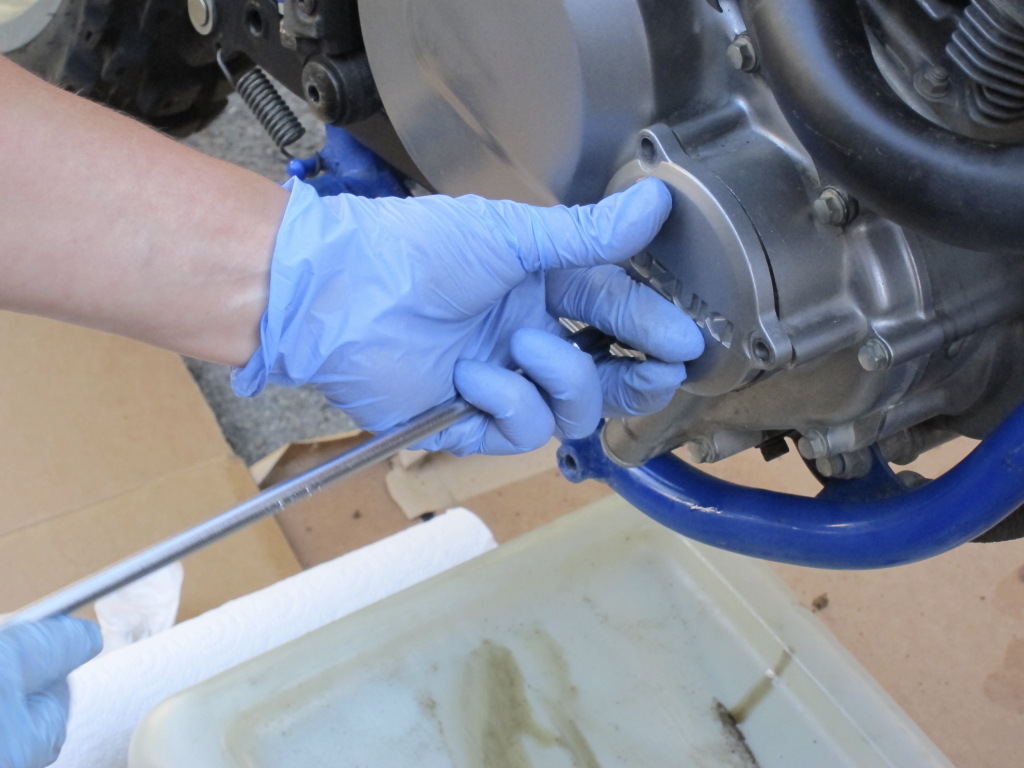
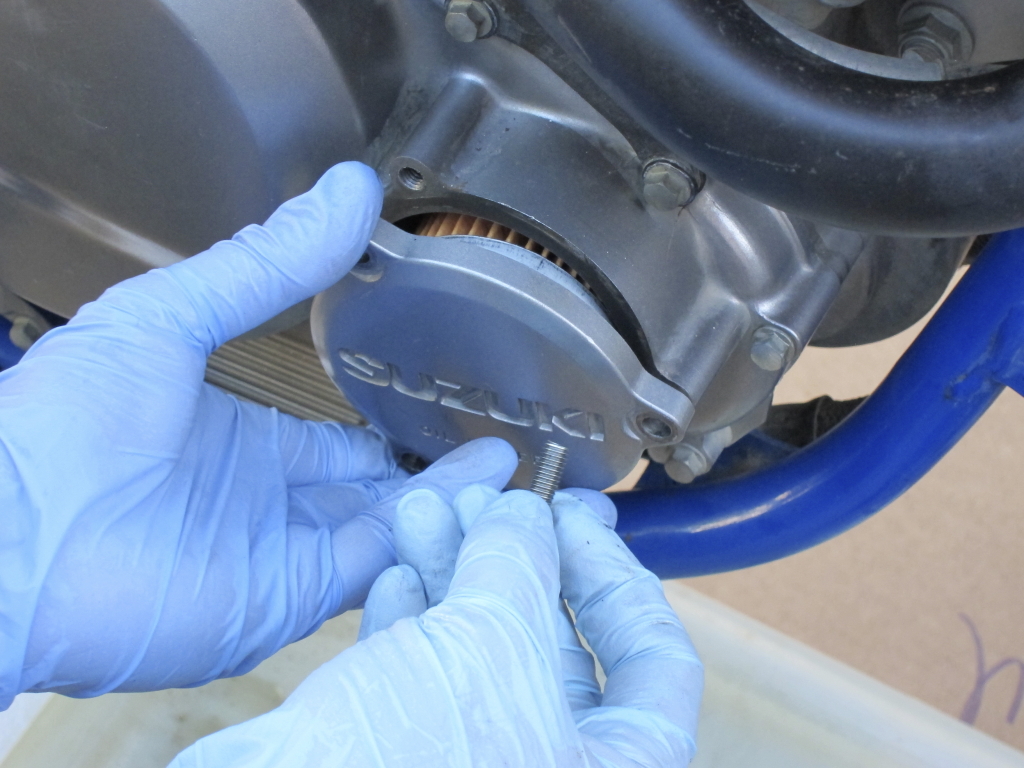
The oil filter was my next stop. A plate on the right side of the engine protects the oil filter beneath. I removed the 8mm bolts.
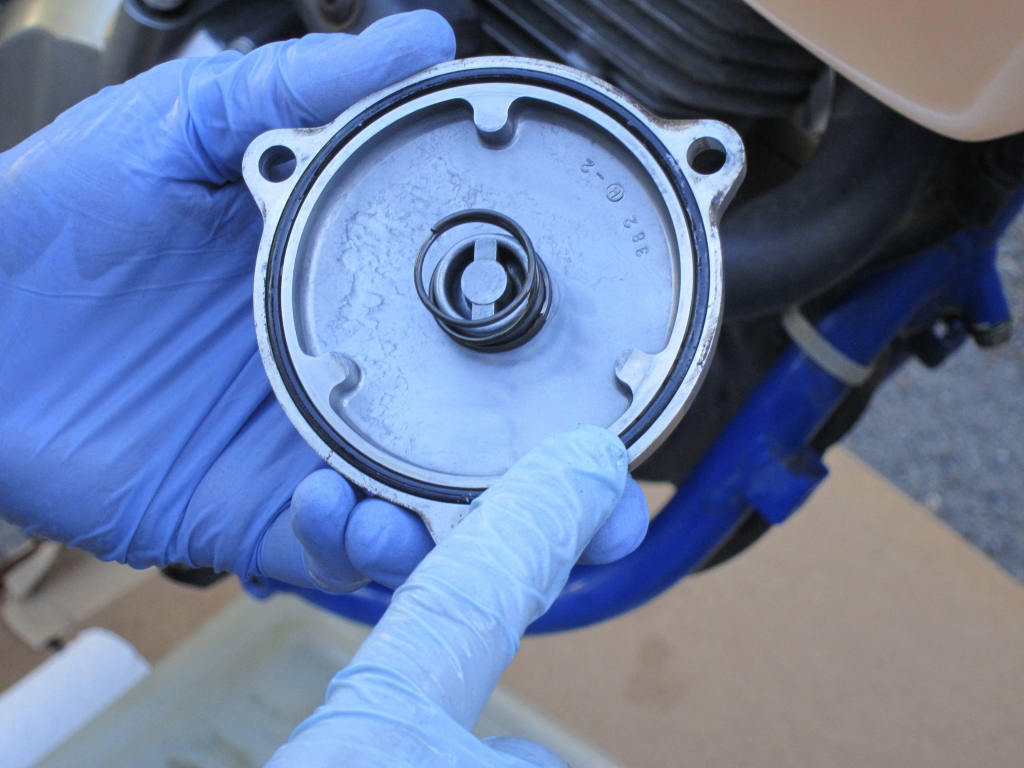
The plate has a spring beneath it, so I held the plate pressed against the engine while I removed the rest of the bolts, so the plate wouldn’t bounce off before all the bolts were out.
When the plate was off, I inspected its o-ring for cracks, flat spots and wear that might cause leaks.
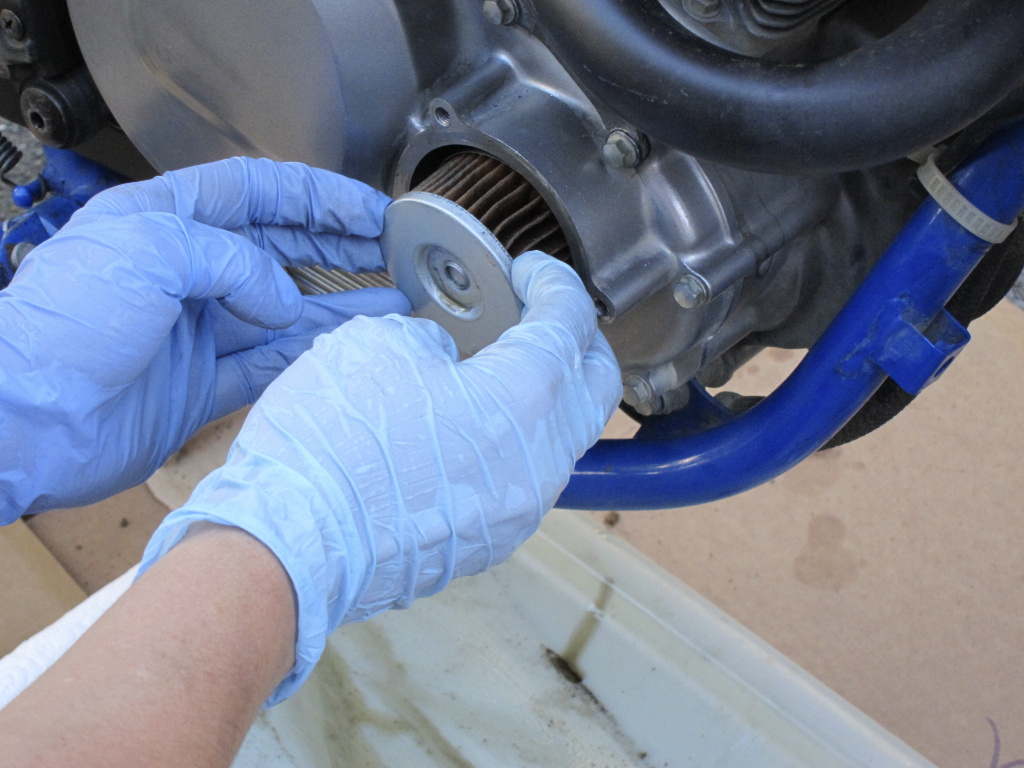
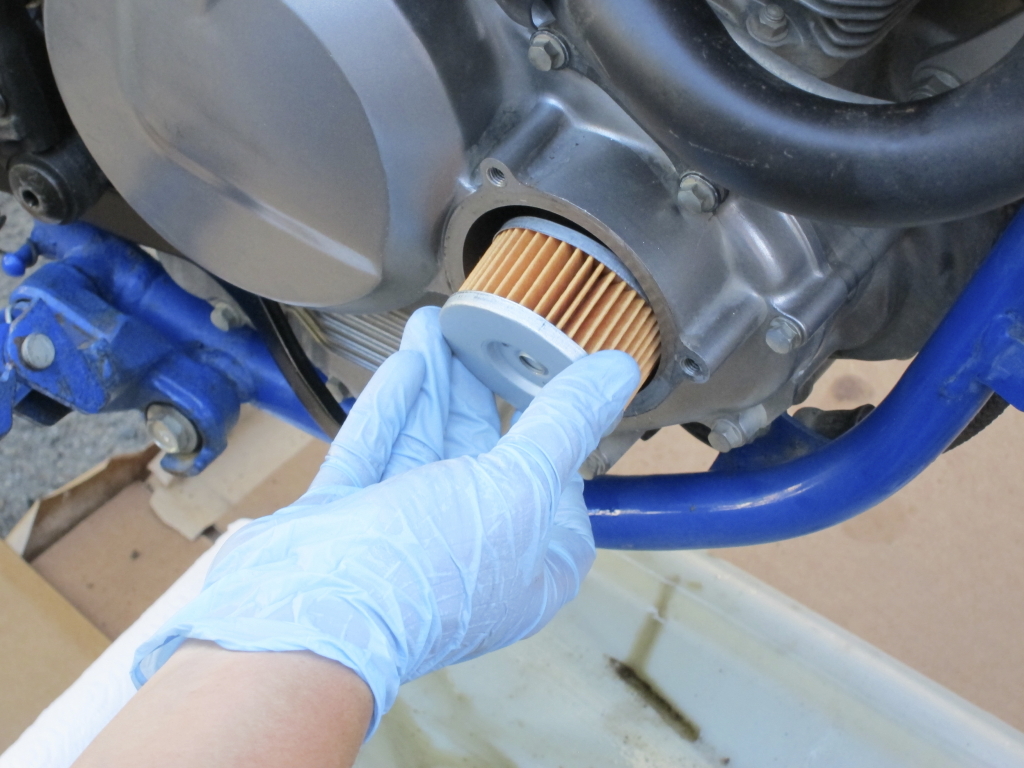
Setting the plate aside carefully, I removed the old oil filter, noting its orientation as I removed it.
I stuck the old filter in my Riders Recycle drain container (come to one of our events to get one) and left it to drain. I’ll take them to my local recycling place soon.

The new filter, ready to go.
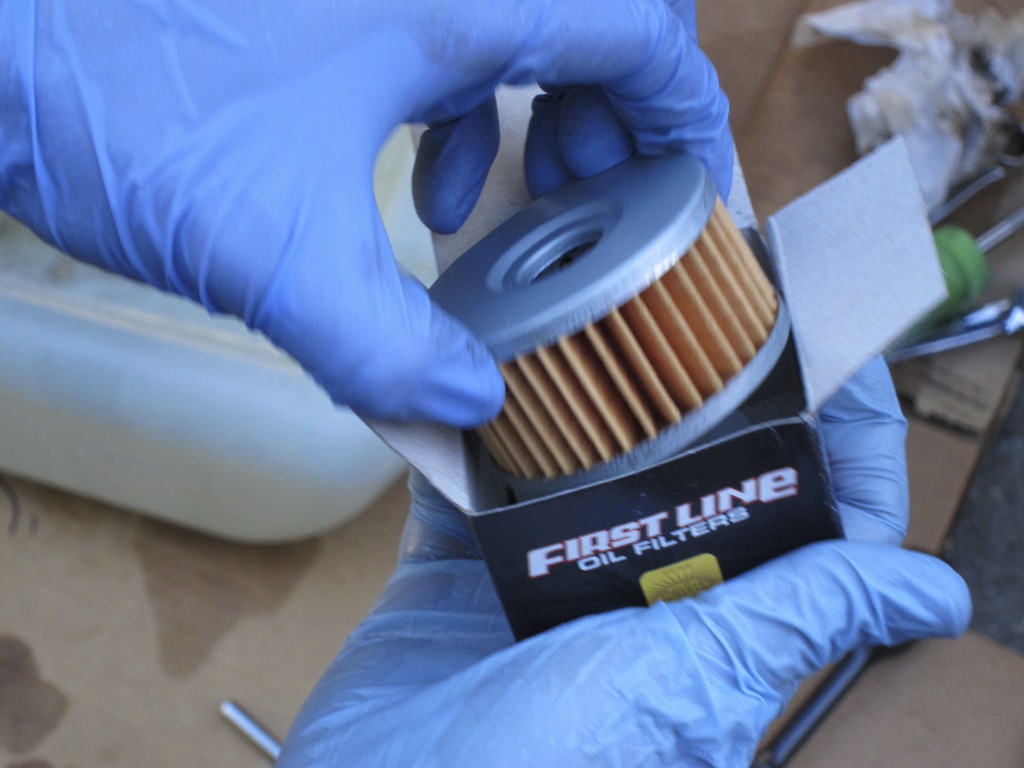
I placed the new filter on the oil filter boss, in the same direction as the old one.
I held the plate again, to prevent the spring from pushing it off, and replaced the 8mm bolts. These are very small bolts, easy to strip or break, so don’t overtighten them!
I wanted to clean everything up after making an oily mess, so I sprayed Winzer’s MPS-100, a general-purpose solvent, over the oily and dirty surfaces then wiped them down.

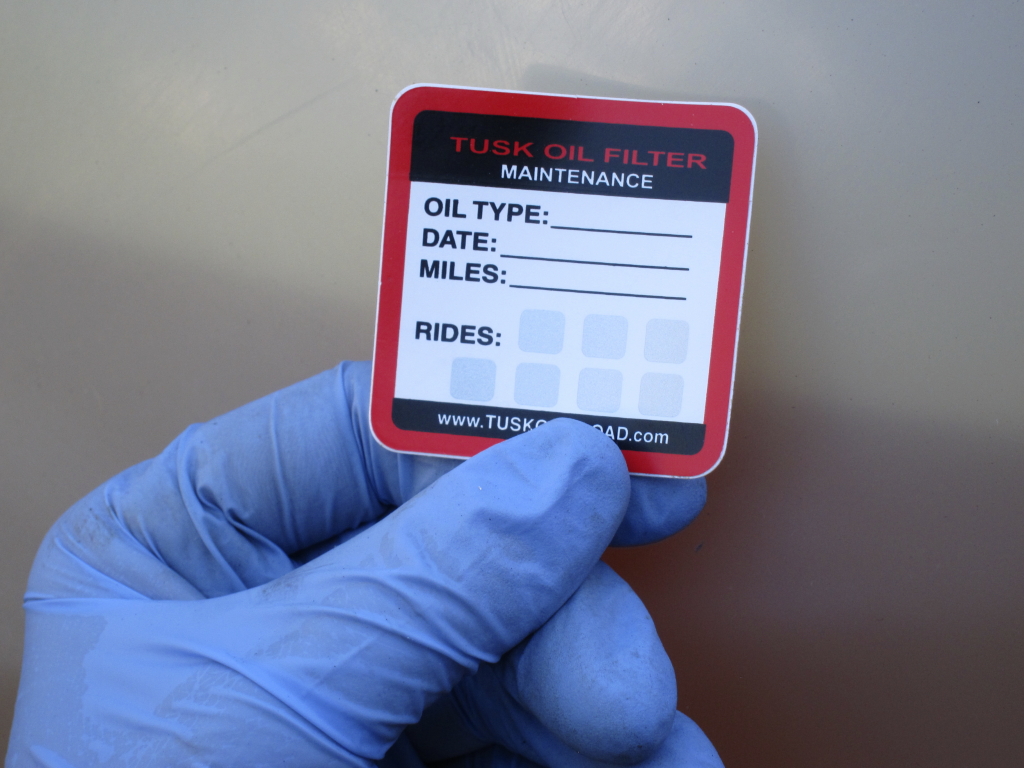
The new filter came with a handy tag to note the mileage at the oil change, and the mileage when the next one was due; for a dirt-use dualsport like this one, I like to change the oil every 1500 miles or so when ridden hard. I keep a maintenance spreadsheet for this bike, so I elected not to use the tag.
With everything drained and cleaned and a new filter in place, it was time to button the bike back up. Note that there is no oil pan, simply the bottom of the crankcase. This means it’s important not to strip the threads, as there is no oil pan to remove and repair!
I replaced the oil drain bolt (with its fresh crush washer) first.
Next, I re-inserted the oil screen into the frame and tightened it down well. I slipped the main oil line hose back over its fitting, and screwed the clamp down firmly.
After this, I replaced the 12mm oil frame drain bolt. The bike was now ready for fresh oil.
For motorcycles, full synthetic is nice, but not necessary. I use conventional “dino” oil on this bike, 10w40 weight as called for in the manual. When buying conventional oil, look for the roundel on the back–the bottom section of the circle should be EMPTY. If it is not, it has additives that are useful for car engines, but will make the bike’s clutch slip and possibly cause additional damage.

Looking at the API roundel–note the empty bottom circle. It’s fine for use in motorcycles.

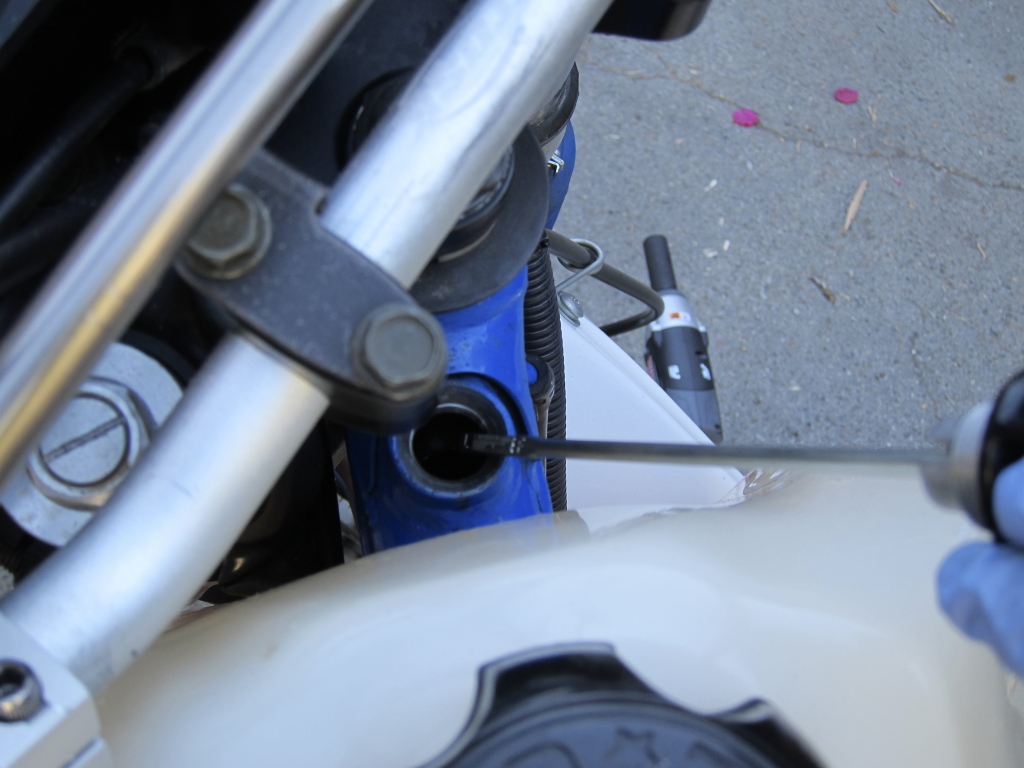
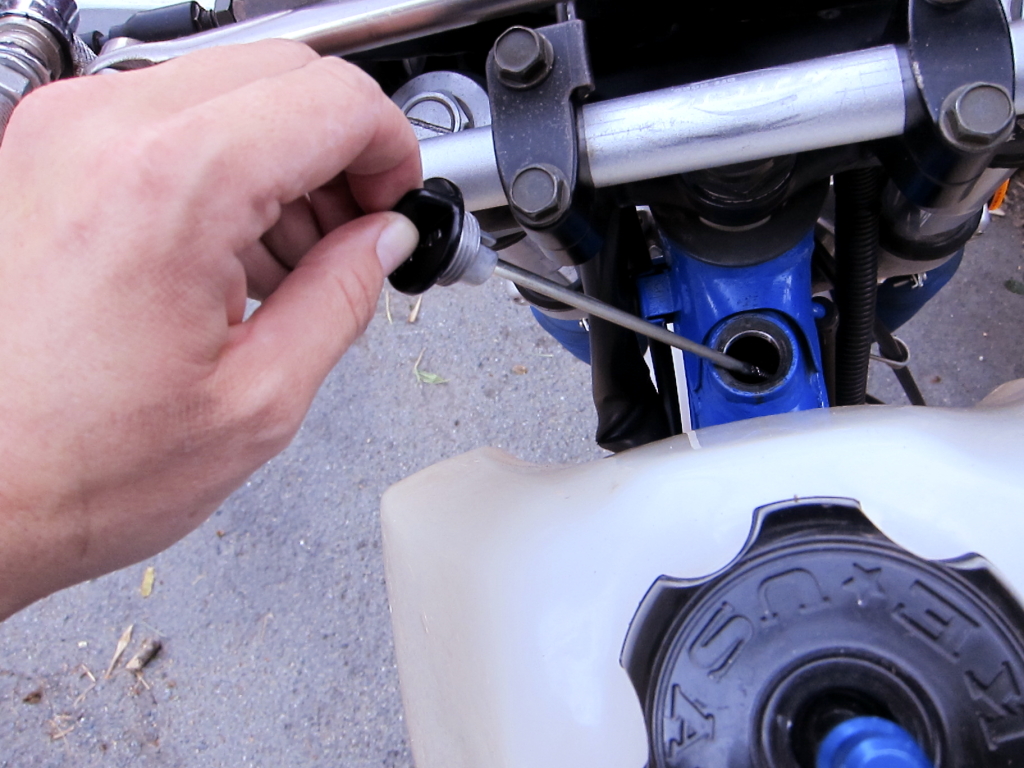
Oil is both checked and added, on this bike, from a check and filler hole between the handlebars and gas tank. I removed the oil dipstick and set it aside.
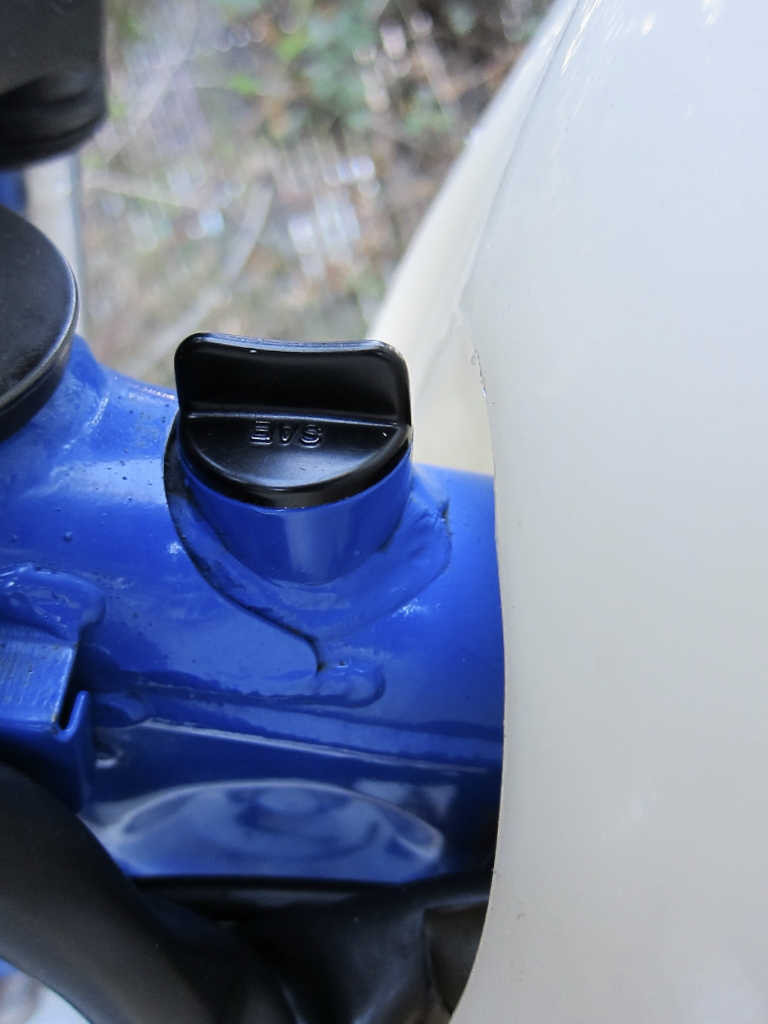
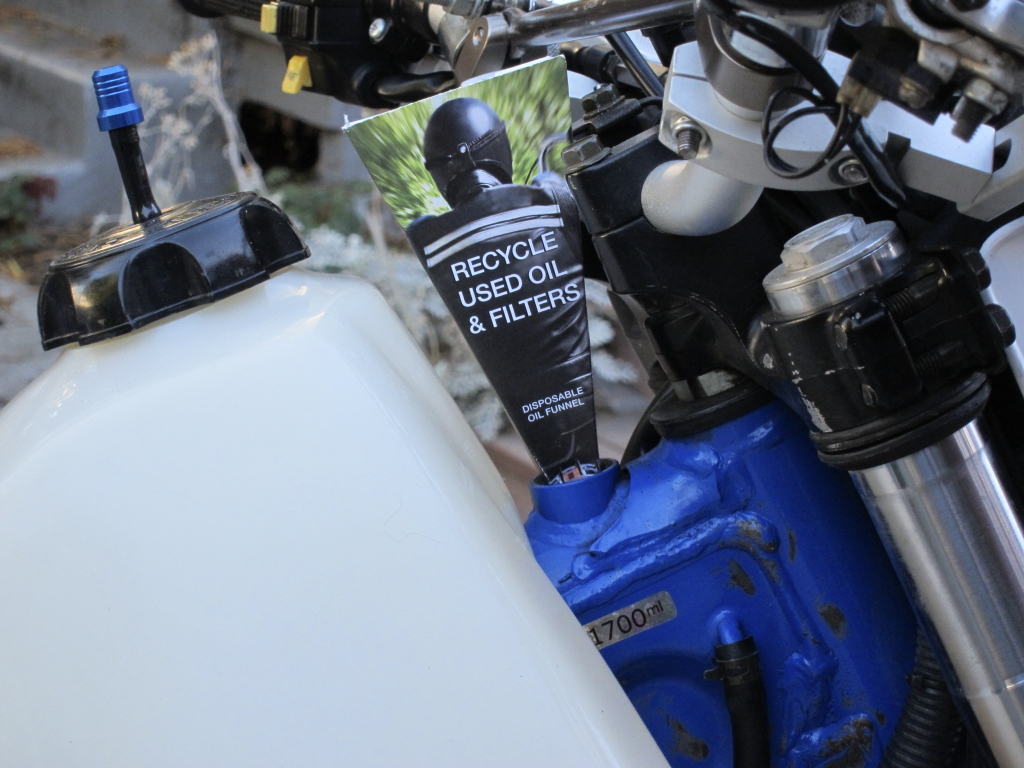
Then I checked the manual for the bike’s oil capacity–1900 ml. I opened up my Riders Recycle funnel (we give these away at our events, too) and proceeded to add oil.
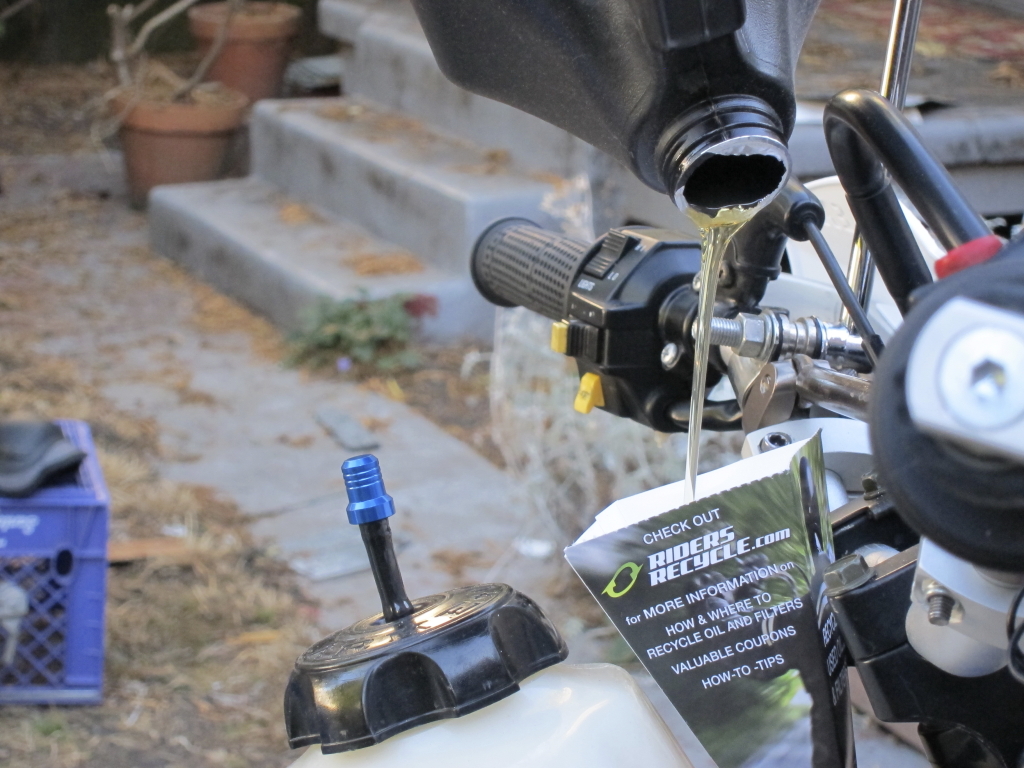
When I’d added about 1500 ml, I stopped, re-inserted the dipstick, and asked my trusty assistant to kick start the bike. I wanted there to be enough oil to protect the engine, but not so much that it would be overfilled; better to add more than to have to drain some out from the frame and sump. This bike, too, needs to be warm to get an accurate dipstick reading.
Once the bike had run for a few minutes and was warm, I stopped it, waited 2 minutes for all to cool down, and checked the dipstick.
The oil level was, as I expected, slightly low, so I added 400 ml more, then closed up the dipstick, had my buddy kickstart the bike, and checked the oil again. At last, the dipstick indicator had oil up to the top of the hash marks, showing that the oil was full (the oil is so clear it’s tough to see in the photo, but it’s there.)
The oil was full, the bike was clean and buttoned up, and it was time for a ride! Too bad I have a little more healing to do before I can ride…
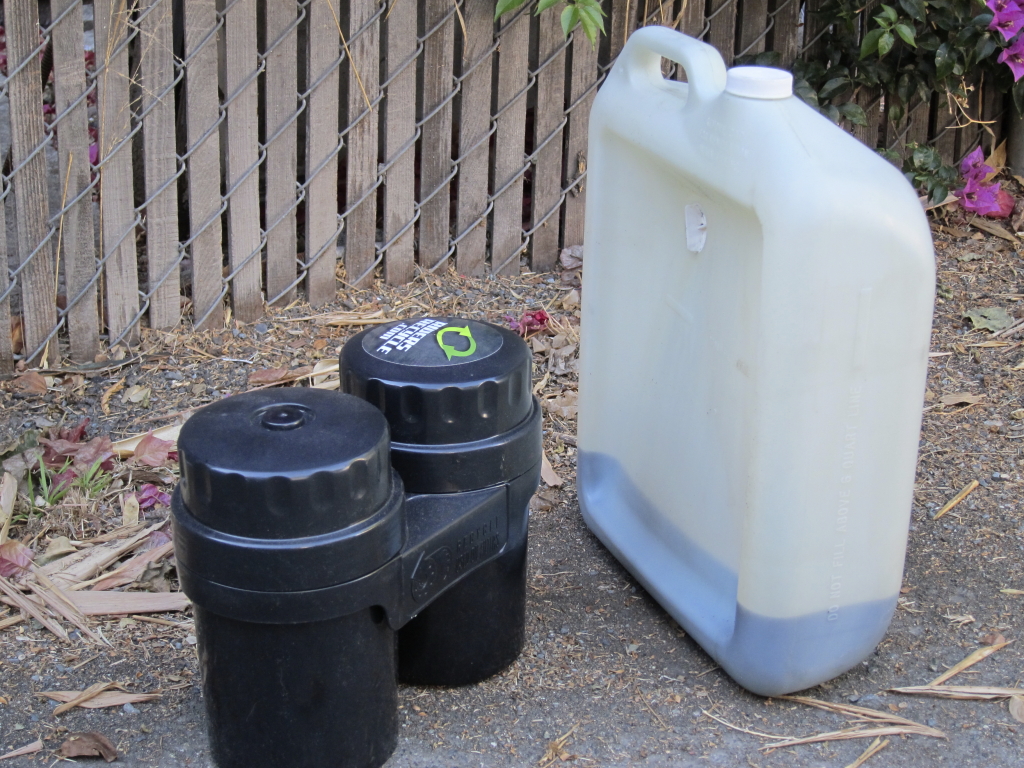
 </a
</aMy drain pan with its old oil and my filter container, with dirty filter. They were ready to take to me local retail auto shop for recycling. With these, recycling is quick, easy and clean.
Here’s hoping this instructional inspires you to do your own DIY oil change. Find out how to easily recycle your used oil and filters in San Mateo County, San Francisco, Alameda County, Sonoma County, Napa County, Marin County and Sacramento. If you’re not in those counties, find your own convenient oil and filter recycling location HERE.
I have one that has done 33000 and hasent been touched and I am going to give it some live and put a new piston in
Just realized I have had my filter on backwards the last two oil changes I did I have a 1990 dr350s the pic shown above is the correct way though for sure? Small metal hole on outside and bigger uncovered hole towards bike?
I have a 1991 Dr 350s and your step by step was very good thanks for taking the time to do it, It was most useful.
Thanks to this awesome page, I found my 1992 DR350S oil strainer for the first time in 21 years! I had previously always skipped that step during oil changes. It had about a dozen table-salt-sized black particles in it, and was 99+% clear and free-flowing. Removing the strainer damaged the old o-ring. Anyone else who hasn’t cleaned yours yet, maybe don’t bother. Ever. Then you don’t have to remove the skid plate, either.
Nice job on the step by step oil change and level check. I have a 92 DR 350S with 13,200miles and she’s never skipped a beat. 🙂
You forgot to mention the inner oil filter O-Ring, and filter cover O-ring.
Hey thanks for these tutorials on the dr350! The detailed descriptions and photos make it easy to understand the process. Keep it up, you rock. Hope the leg is better.